Building reliable machine learning pipelines with AWS Sagemaker and Comet
This tutorial is Part II of a series. See Part I here.
Successfully executing machine learning at scale involves building reliable feedback loops around your models. As your pipeline grows, you will reach a point where your data can no longer fit in memory on a single machine, and your training processes will have to run in a distributed way. Regular retraining, and hyperparameter optimization of models, will become necessary as new data becomes available and your underlying feature distributions change.
There is also the added complexity of trying new modeling approaches on your data and communicating the results across teams and other stakeholders.
In this blog post, we will illustrate how to use AWS Sagemaker and Comet.ml to simplify this process of monitoring and improving your training pipeline.
Data complexity + model needs are growing
The challenges involved in creating functional feedback loops extend beyond data concerns like tracking changing data distributions to issues at the model level. Robust models require frequent retraining so that hyperparameters are optimal in the face of new, incoming data.
With each iteration, it becomes harder to manage subsets and variations of your data and models. Keeping track of which model iteration ran on which dataset is key to reproducibility.
Take that complexity + multiply it by team complexity
Managing these complex pipelines can become even more difficult in team settings. Data scientists will often store results from several models in log files, making it impossible to reproduce models or communicate results effectively.
Traditional software development tools are not optimized for the iterative nature of machine learning or the scale of data machine learning requires. The lack of tools and processes to make collaboration easy across members of the same data science teams (and across functions like engineering) has led to dramatically slower iteration cycles. Organizations also constantly suffer the pain of slow on-boarding times for new employees and bear the risk of employees churning along with their work and proprietary knowledge.
Tutorial
This tutorial covers how to integrate Comet.ml with AWS Sagemaker’s TensorFlow Estimator API. We will be adapting running the Resnet model on the CIFAR10 dataset with TensorFlow.
Instead of logging experiment metrics to Tensorboard, we’re going to log them to Comet.ml.
This allows us to keep track of various hyperparameter configurations, metrics, and code across different training runs.
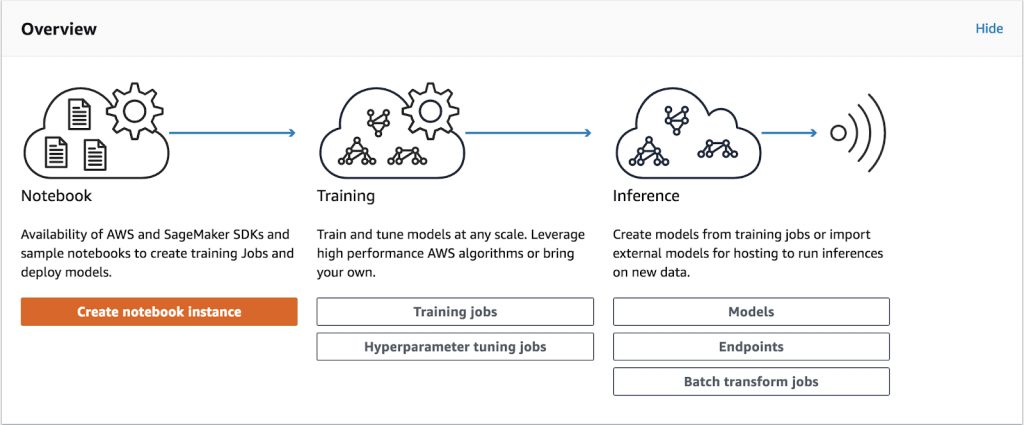
- AWS SageMaker provides convenient and reliable infrastructure to train and deploy machine learning models.
- Comet.ml automatically tracks and monitors Machine Learning experiments and models.
You can check out Comet.ml here and learn more about AWS Sagemaker here.
Environment Setup
When using AWS Sagemaker, your account comes with multiple pre-installed virtual environments that contain Jupyter kernels and popular python packages such as scikit, Pandas, NumPy, TensorFlow, and MXNet.
1. Create a Sagemaker account. You’ll be guided through all the steps for getting your credentials to submit a job to the training cluster here.
2. Set up your Comet.ml account here. Once you login, we’ll take you to the default project where you’ll see the Quickstart Guide that provides your Project API Key.
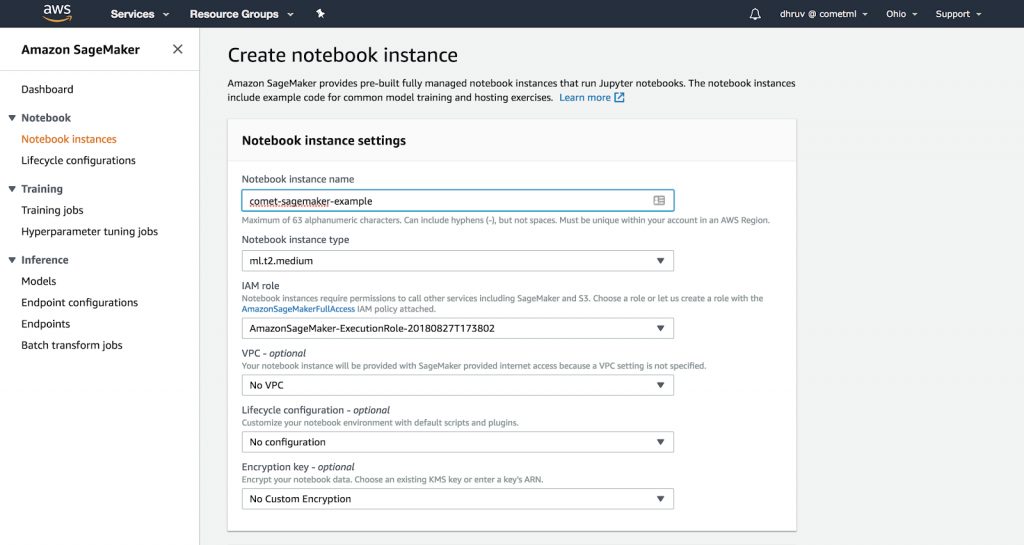
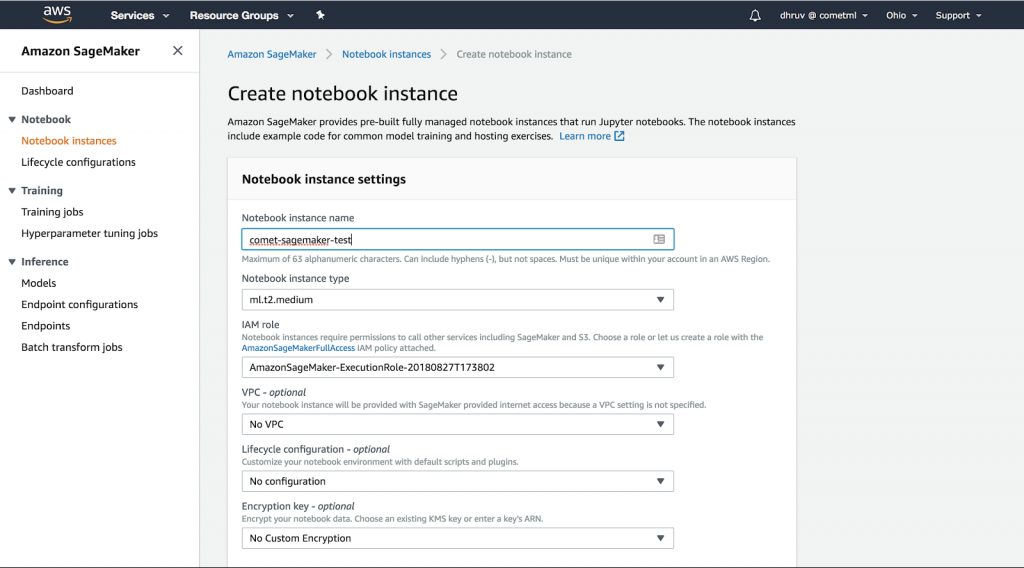
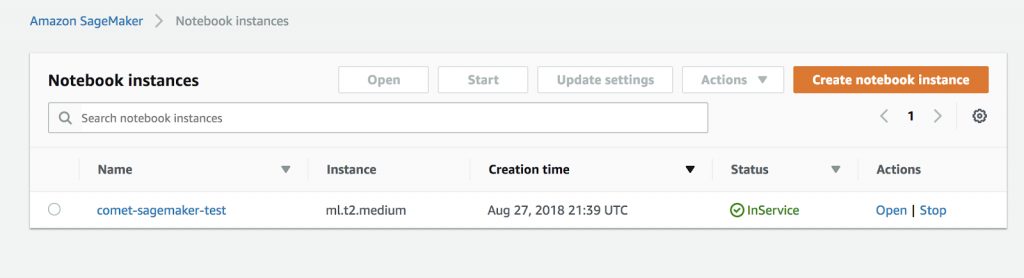
3. Create a Sagemaker notebook instance, and start a new terminal from this instance.
4. Open up a new Terminal instance (using the New dropdown). Using the command line, activate the tensorflow_p36 virtual environment
$ source activate tensorflow_p36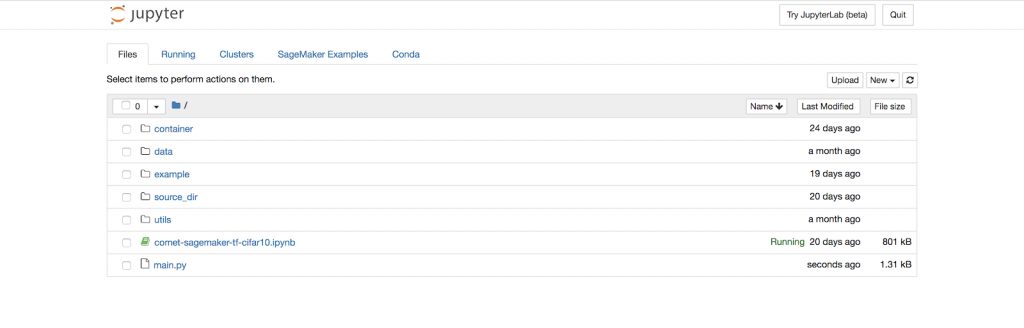
Using the terminal, clone the Sagemaker example from https://github.com/comet-ml/comet-sagemaker into your Sagemaker instance.
$ git clone https://github.com/comet-ml/comet-sagemaker.git && cd comet-sagemakerThe repository has the following structure
.
├── Dockerfile
├── README.md
├── build_and_push.sh
├── cifar10
│   ├── __init__.py
│   ├── cifar10.py
│   ├── nginx.conf
│   ├── requirements.txt
│   ├── resnet_model.py
│   ├── serve
│   └── train
├── generate_cifar10_tfrecords.py
└── main.py
Using Sagemaker’s Bring Your Own Model
Sagemaker allows users to run custom containers on their platform. We are going to extend the Sagemaker TensorFlow docker image by installing Comet. This will allow us to automatically track our training from inside the container.
We will first download the CIFAR10 dataset in the TFRecords format.
python generate_cifar10_tfrecords.py --data-dir /tmp/cifar10-dataNext, we’re going to add our Comet API key to the Dockerfile as an environment variable
# Copyright 2017-2018 Amazon.com, Inc. or its affiliates. All Rights Reserved.
#
# Licensed under the Apache License, Version 2.0 (the "License"). You
# may not use this file except in compliance with the License. A copy of
# the License is located at
#
#     http://aws.amazon.com/apache2.0/
#
# or in the "license" file accompanying this file. This file is
# distributed on an "AS IS" BASIS, WITHOUT WARRANTIES OR CONDITIONS OF
# ANY KIND, either express or implied. See the License for the specific
# language governing permissions and limitations under the License.

# For more information on creating a Dockerfile
# https://docs.docker.com/compose/gettingstarted/#step-2-create-a-dockerfile
FROM tensorflow/tensorflow:1.8.0-py3

RUN apt-get update && apt-get install -y --no-install-recommends nginx curl

# Download TensorFlow Serving
# https://www.tensorflow.org/serving/setup#installing_the_modelserver
RUN echo "deb [arch=amd64] http://storage.googleapis.com/tensorflow-serving-apt stable tensorflow-model-server tensorflow-model-server-universal" | tee /etc/apt/sources.list.d/tensorflow-serving.list
RUN curl https://storage.googleapis.com/tensorflow-serving-apt/tensorflow-serving.release.pub.gpg | apt-key add -
RUN apt-get update && apt-get install tensorflow-model-server

ENV PATH="/opt/ml/code:${PATH}"
ENV COMET_API_KEY YOUR_API_KEY
# /opt/ml and all subdirectories are utilized by SageMaker, we use the /code subdirectory to store our user code.
COPY /cifar10 /opt/ml/code
RUN pip install -r /opt/ml/code/requirements.txt
WORKDIR /opt/ml/code
After adding our API key to the Dockerfile, we’re going to build our container image and push it to AWS Elastic Container Respository using the build_and_push script.
chmod +x build_and_push.sh
./build_and_push.sh <name of your image>
Finally, we can run the training job
python main.py --data /tmp/cifar10-data --container_name <name of your image>If the training is successful you should see the following message
2019-08-04 22:55:34 Starting - Starting the training job...
2019-08-04 22:55:36 Starting - Launching requested ML instances......
2019-08-04 22:56:37 Starting - Preparing the instances for training...
2019-08-04 22:57:35 Downloading - Downloading input data
2019-08-04 22:57:35 Training - Downloading the training image......
2019-08-04 22:58:31 Training - Training image download completed. Training in progress.........
Training complete.
2019-08-04 22:59:53 Uploading - Uploading generated training model
2019-08-04 22:59:53 Completed - Training job completed
Setting up a Comet Project and Hyperparameters
We can set a specific workspace and project name in the Comet Experiment object in the cifar10.py file.
The hyperparameters for this experiment are in this same file. Feel free to adjust them. However, you will have to build and push the container again after changing these parameters.
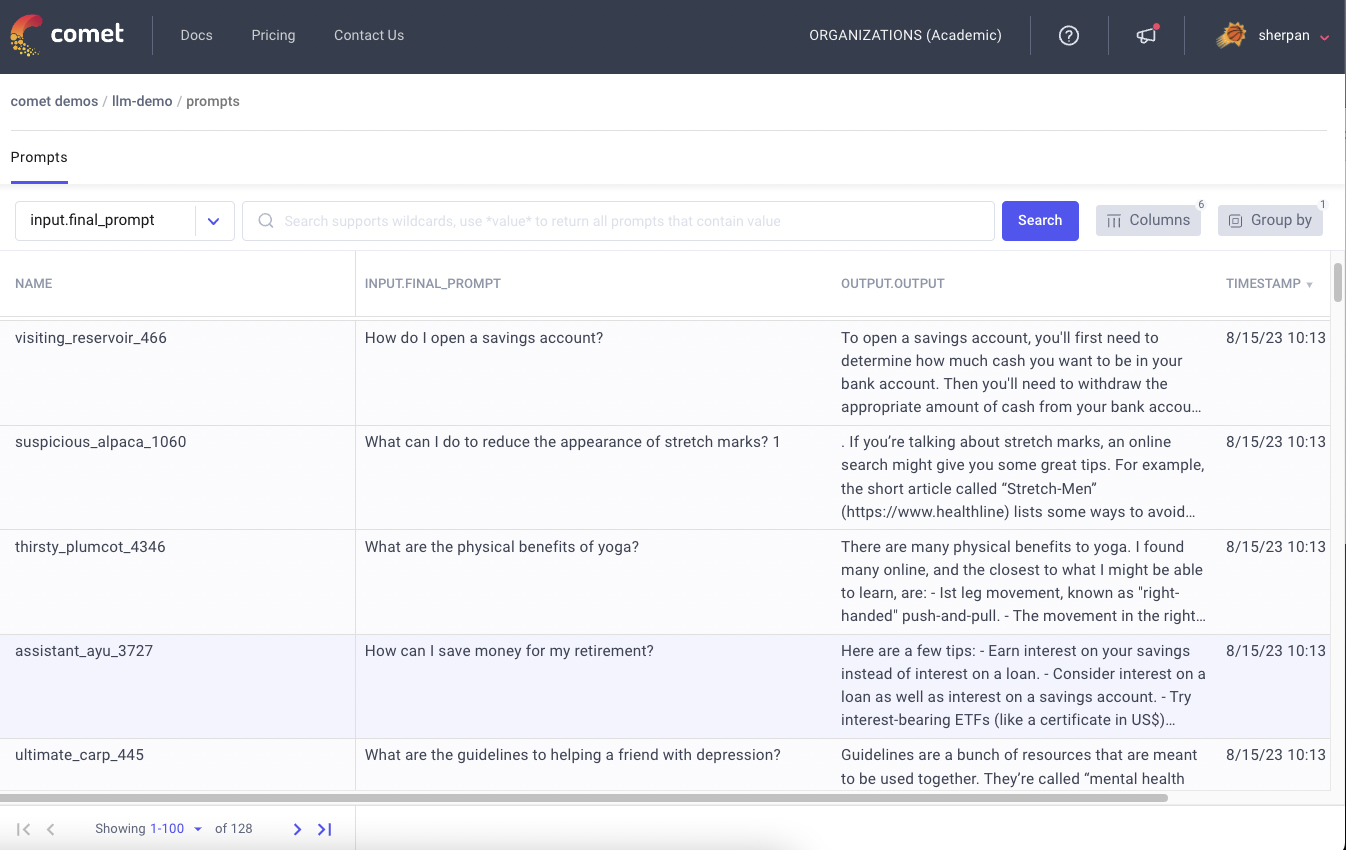
Monitoring experiments in Comet.ml
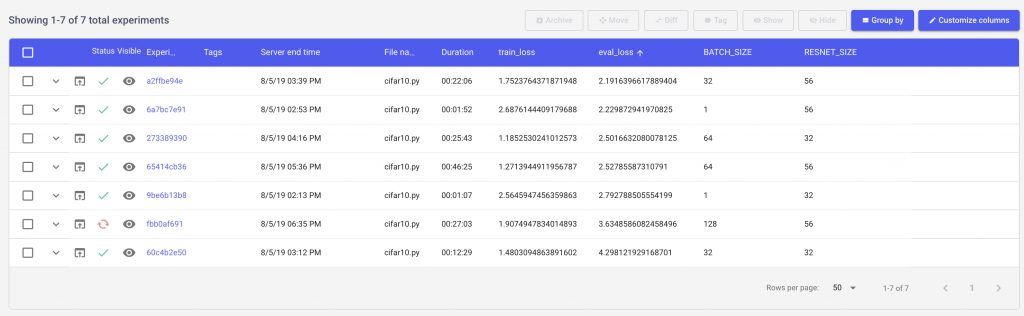
Once you run the script, you’ll be able to see your different model runs in Comet.ml through the direct url. As an example for this tutorial, we have created a Comet project that you can view here
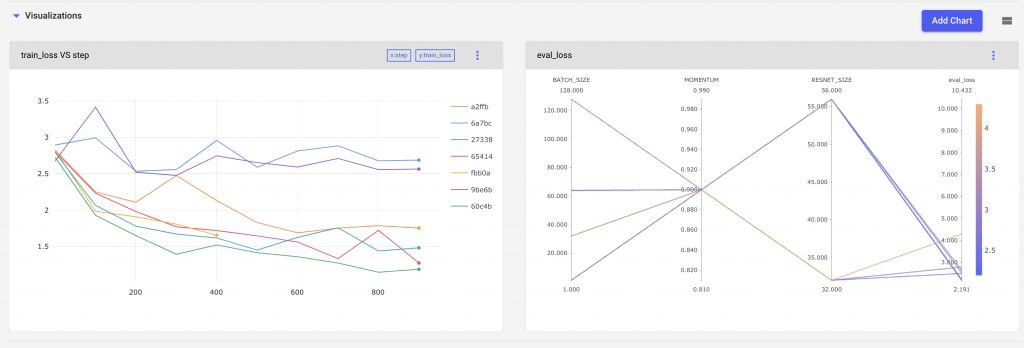
Let’s see how we can use Comet to get a better understanding of our model. We’ll start by sorting our models based on the best evaluation loss seen after 1000 steps of training.
Now let’s add a few visualizations to our project so that we can see how our hyperparameters are impacting our experiment. We can setup a project level line chart to compare our experiments across multiple runs.
Then let’s use a parallel coordinates chart to visualize which parts of our hyperparameter space are producing the best results.
We can also filter out experiments using Comet’s query builder. For example we can compare results from experiment where the RESNET size is 32
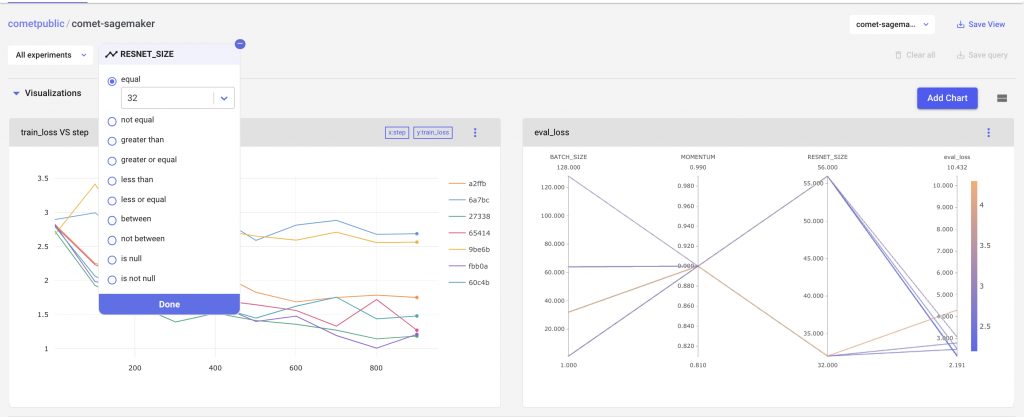
We can see that our charts, and experiment table all change based on the filters applied to the experiments.
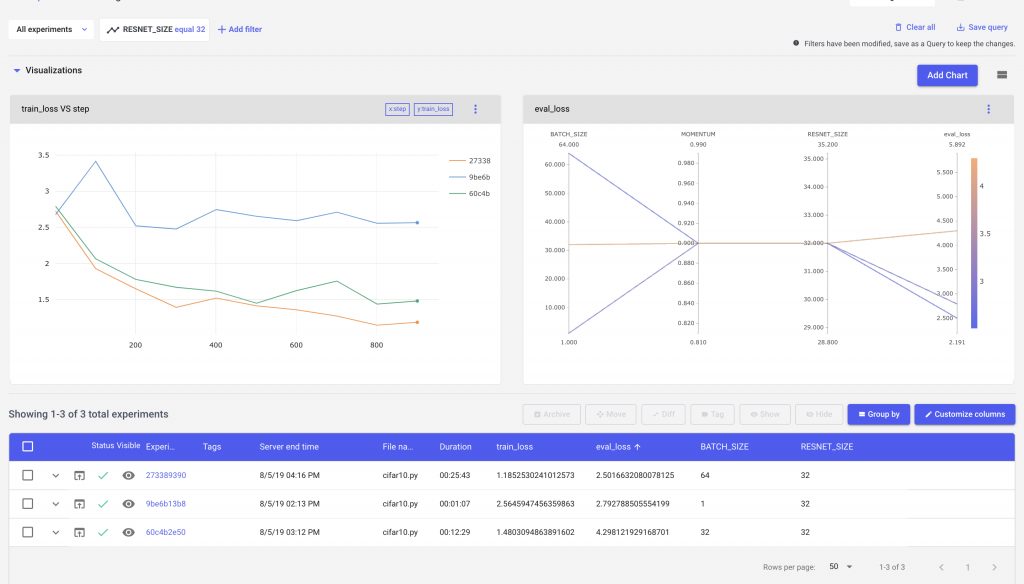
Our parallel coordinates chart is able to show us parts of the parameter space that we have explored, as well as where we have gaps. In this example, we see that a larger Resnet Size, and Batch Size produces a more accurate model.
We can use these insights to continue iterating our model design, until we have satisfied our requirements.
Comet.ml allows you to create visualizations like bar charts and line plots to track your experiments along with parallel coordinate charts. These experiment-level and project-level visualizations help you quickly identify your best-performing models and understand your parameter space.
If you’d like to share your results publicly, you can generate a link through the Project’s Share button. Alternatively, you can also directly share experiments with collaborators by adding people as collaborators in your Workspace Settings.
Tutorial Summary
You have learned how to prepare and train a Resnet model using Comet.ml and AWS Sagemaker’s TensorFlow Estimator API. To summarize the tutorial highlights, we:
- Trained a Resnet model on the CIFAR-10 dataset in an Amazon Sagemaker notebook instance using one of Sagemaker’s pre-installed virtual environments
- Explored a different iteration of the training experiment where we varied the hyperparameters
- Used Comet.ml to automatically capture our model’s various hyperparameter configurations, metrics, and code across different training runs.
Sign-up for a free trial of Comet.ml here.
Related Articles